Self-service Automation
How I built a visual map of automation flows that helped in reducing the contact rate in support teams, and improved customer resolution times.
1. Overview
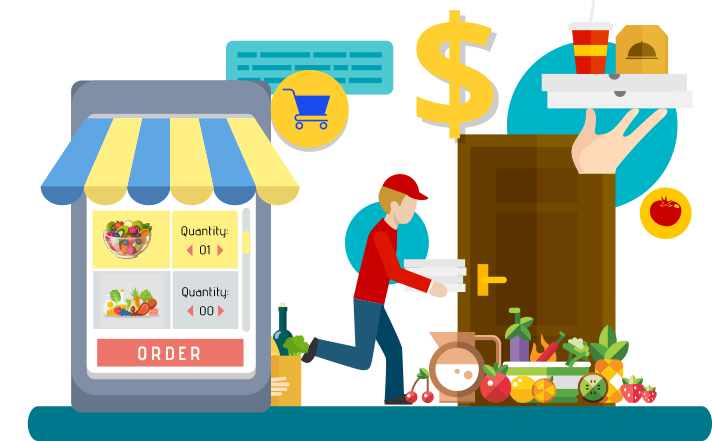
🍕Imagine this: A customer eagerly orders food online. The meal arrives on time, but—uh-oh—it’s the wrong order. Frustrated, they try to contact support, only to face long wait times due to overwhelming call volumes.
But here’s the twist—it’s not due to an inefficient support center or a faulty product. The real issue?
🚨 Lack of automation for common, repetitive problems that machines could easily handle.
In a business processing 2.8 billion+ orders daily (that’s 100+ orders per second!), relying solely on human agents is unsustainable. Humans should focus on complex, non-automatable issues—not on repetitive ones that could be resolved instantly.
Across 70+ countries, customer support teams relied on manual, code-heavy automation tools. The central team proposed automation flows, but local teams struggled to implement them, leading to delays, errors, and inefficiencies.
🚨 The result? Slow automation rollouts, fragmented workflows, and increased agent workloads.
💬 “The documentation is impossible to follow. I waste hours trying to adapt automation rules.” – Local support specialist
💬 “I don’t know what this automation actually does until I test it live with customers, which is risky.” – Template author
As a Product Designer lead at Delivery Hero, I led the design of a visual, no-code automation builder that enabled teams to create, modify, and test workflows—without relying on engineers.
🔹 Goal: Build a self-service, visual automation tool to reduce engineering bottlenecks and enable faster automation rollouts.
🔹 Impact: Faster adoption, fewer manual errors, and improved customer resolution times.
Here’s how I made it happen. 🚀
2. Context: Why Automation wasn’t Scaling
The Challenge: Code-heavy, fragmented workflows
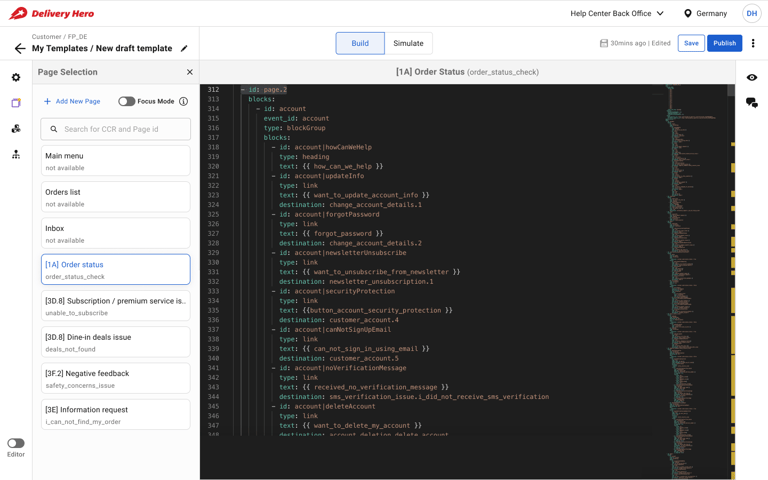
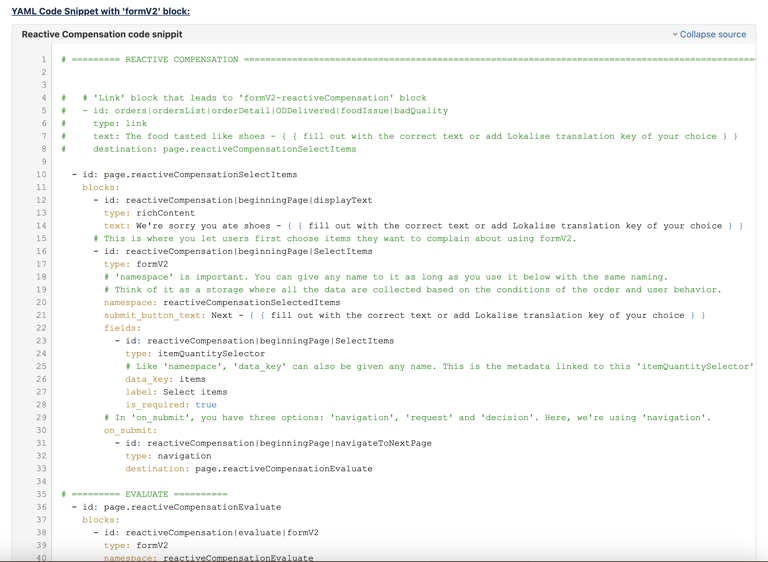
Currently, automation is managed through a coding platform. The central team designs workflows, documents them, and shares them with local teams, who then manually implement the logic in their local systems. But this process is error-prone and inefficient:
🛑 Inconsistent Implementations – Local teams misinterpret documentation, leading to automation failures.
🛑 No Visibility Into Automation Logic – Teams struggle to understand the logical flow of conditions, which are presented only through YAML code.
🛑 Heavy Engineering Dependency – Minor changes require developer intervention, slowing down iterations.
🛑 Risky Live Testing – Lack of simulation tools forces teams to test workflows directly with real customers.
This wasn’t just a usability issue—it was blocking automation adoption at scale.
🚀 The goal: Enable local teams to visualize and modify automation flows without writing code.
3. My Role & Design Approach
🛠️ End-to-End Design ownership
As the Product Design lead, I led the project from problem discovery to solution design, ensuring a user-centric approach at every stage.
My Key Contributions:
🔍 User Research & Discovery: Conducted interviews, facilitated workshops, and analyzed documentation to uncover challenges faced by Template Authors (local teams) and Automation Engineers (central team).
💡 Solution Ideation & Conceptualization: Led brainstorming sessions to explore diverse solutions, defining the core functionalities of the visual automation UI.
🎨 Interaction & UI Design: Designed the user interface, crafted intuitive interaction patterns, and structured a seamless information architecture for the automation builder.
🧪 Prototyping & User Testing: Built interactive prototypes and conducted usability tests to validate designs and refine the user experience based on feedback.
🤝 Cross-Functional Collaboration: Partnered with Product Managers, Engineers, and key stakeholders to align on vision, feasibility, and implementation strategies.
My design process was deeply rooted in user research, ensuring that solutions directly addressed user needs and pain points.
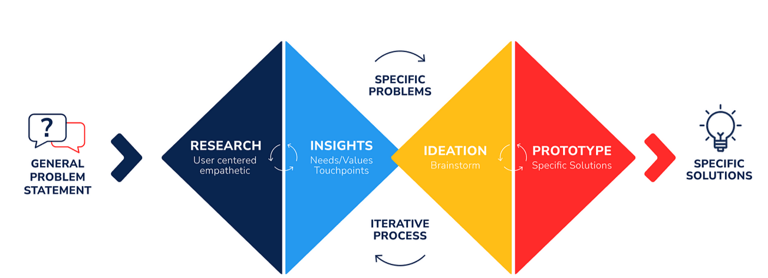
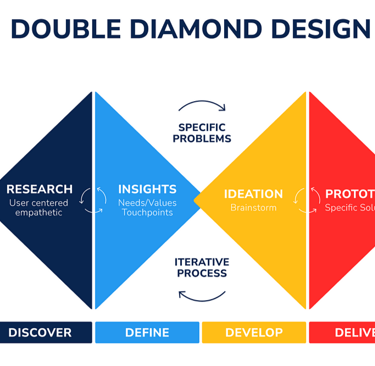
🔎 My design process followed a structured approach:
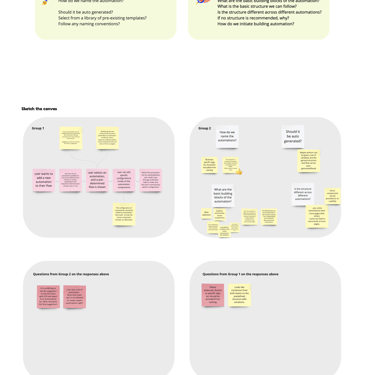
1️⃣ Discovery – User research, journey mapping, and stakeholder workshops.
2️⃣ Definition – Prioritization of key issues and alignment on UX goals.
3️⃣ Ideation – Sketching, wireframing, and designing user flows.
4️⃣ Execution – Prototyping, usability testing, and iterative improvements.
4. Research & Key User Insights
To uncover automation pain points, I conducted:
🗣️ User Interviews: Engaged with 5 key user personas—including Template Authors and a central automation team member—to uncover pain points and inefficiencies. Evaluated how users built automations in the current system.
📂 Contextual Analysis: Reviewed documentation, observed workflows, and analyzed support tickets to gain a holistic understanding of existing automation challenges.
📌 Key research goals:
✔ Understand how users build and modify automation flows today.
✔ Identify blockers in the YAML-based automation process.
✔ Uncover mental models around automation logic.
✔ Pinpoint collaboration gaps between central and local teams.
📌 Artefacts from this phase:
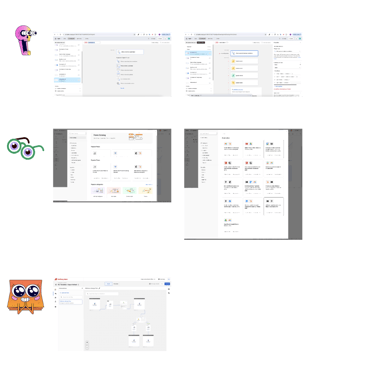
Interview Synthesis: Interview outcomes.
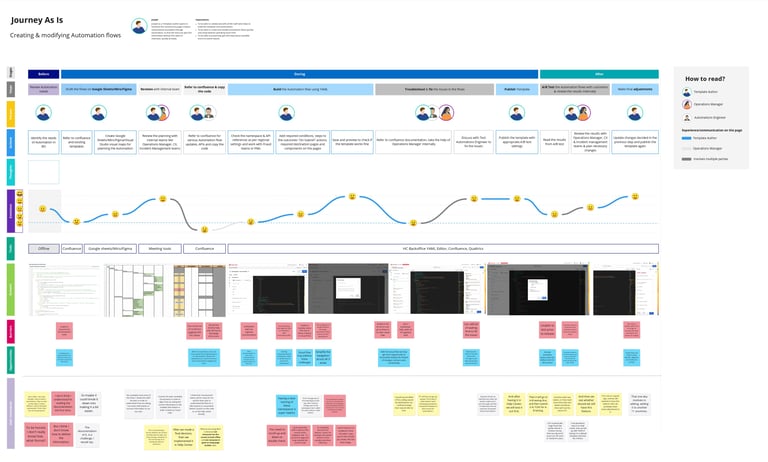
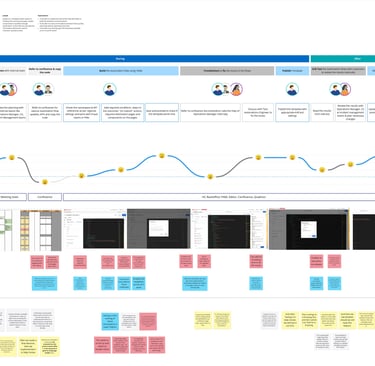
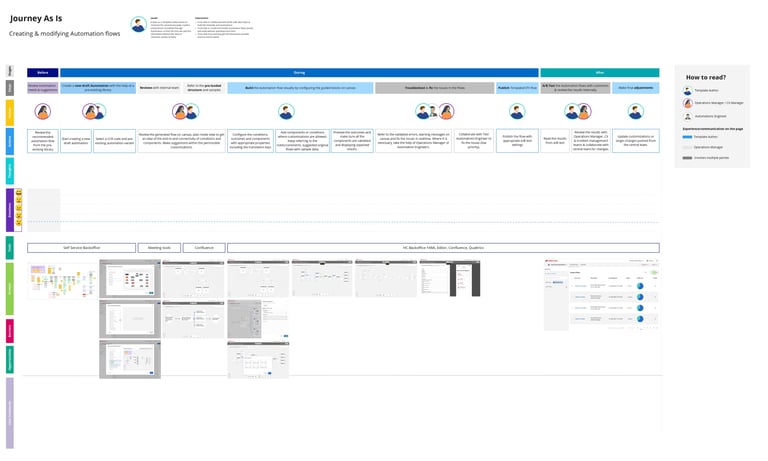
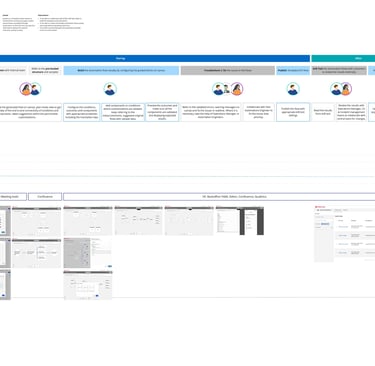
Journey maps: Journey of users through various actions.
Journey map - to be
Journey map - As Is
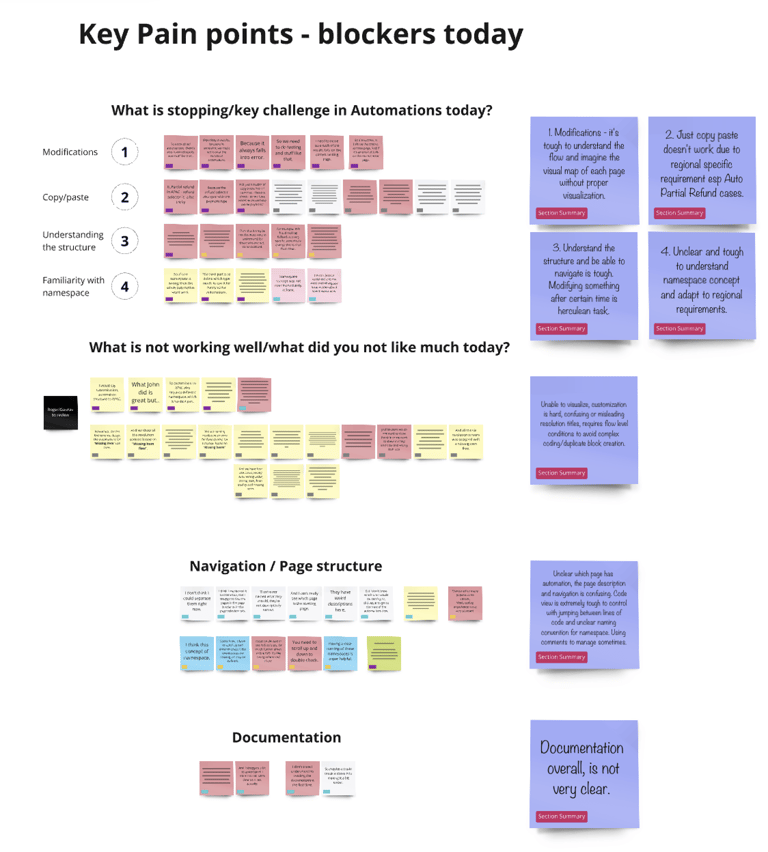
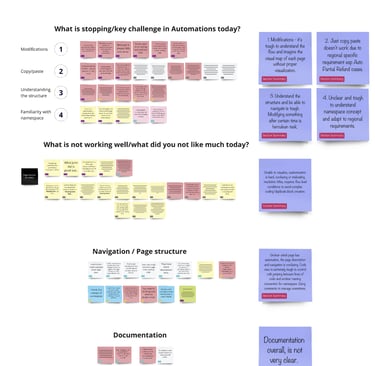
🔍 Key Insights & User Frustrations
📖 Documentation Overload: Template authors struggled with excessive, complex documentation that combined code, instructions, and comments in massive code blocks.
💬 “The documentation is overwhelming… It’s impossible to digest thousands of lines of code and instructions in one place.”
👀 Lack of Visual Representation: The absence of a visual interface made it difficult to understand automation flows and logic.
💬 “It’s tough to grasp the flow of automation without visualization. I can’t picture how everything connects.”
🔍 No Standardized Automation Process – Different teams used Miro, Figma, or Google Sheets to manually document flows, leading to inconsistencies.
🔄 Inefficient Workarounds: Users relied on copy-pasting and searching within code, which was time-consuming and prone to errors.
💬 “Even though coding slows us down, we still resort to copy-paste and search—it’s the only way to manage.”
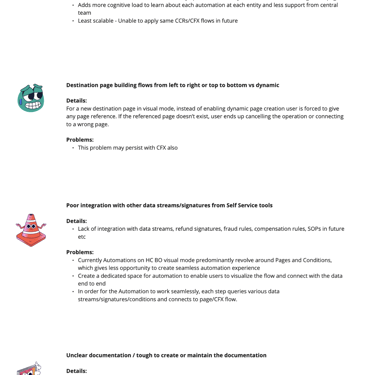
🧭 Navigation & Structural Confusion: Understanding relationships between automation components was difficult, making modifications a huge challenge.
💬 “Figuring out the structure and making edits later is a nightmare.”
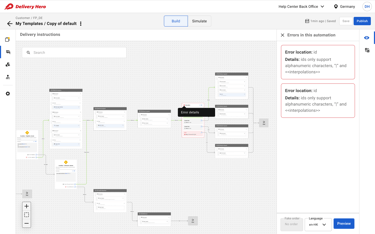
⚠️ No way to Preview, Testing or Simulation Capabilities: Users had to test automations live with real customers, introducing risk and uncertainty.
💬 “Without simulation, we’re forced to A/B test with actual customers, which is risky.”
By identifying these pain points, I shaped a design solution that directly addressed these challenges—making automation more accessible, intuitive, and efficient.
5. Solution Ideation & Execution
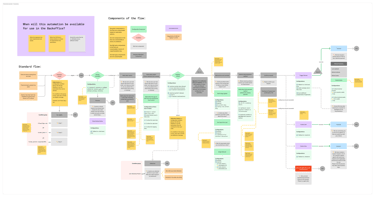
📍 User Flows & Information Architecture
🗺 User Flow Mapping: Clearly outlined the step-by-step journey to create, modify, and deploy automations—ensuring efficiency and ease of use.
📂 Logical Information Architecture: Grouped automation components into intuitive categories for smooth navigation.
📌 Wireframes to High-Fidelity Designs
📑 Wireframing: Focused on layout and structural clarity before refining visual details
Once I identified key issues, I designed three core solutions:
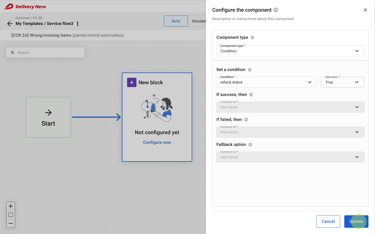
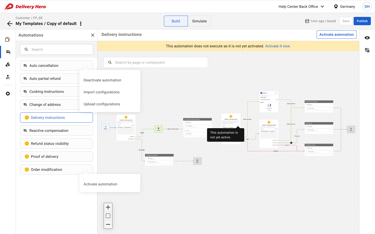
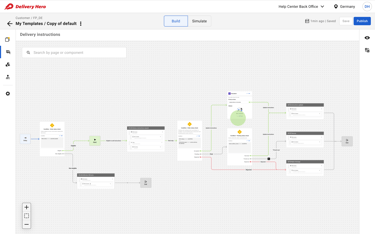
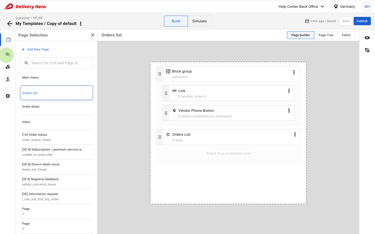
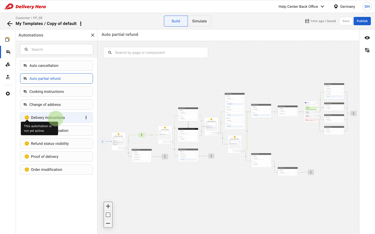
🛠 Visual Automation Builder – Focused on core functionality with a simple canvas and a basic library of automation blocks.
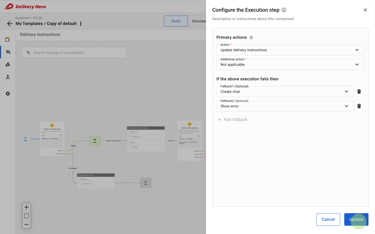
🛠 Pre-built Automation Templates – Introduced tooltips, inline descriptions, and side panels for easy configuration.
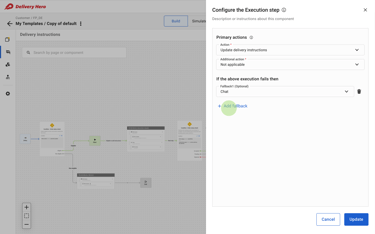
🛠 Real-Time Testing & Simulation – Integrated clear connectors, visual cues, and a simulation mode to test automation before deployment.
🎨 Design Iterations & Key Enhancements
Once I identified key issues, I designed three core solutions:
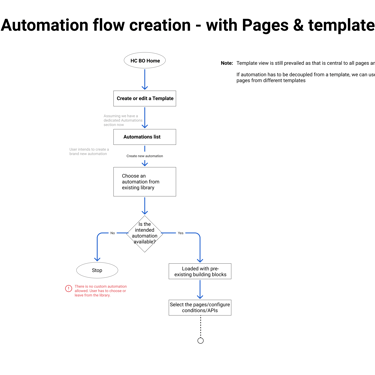
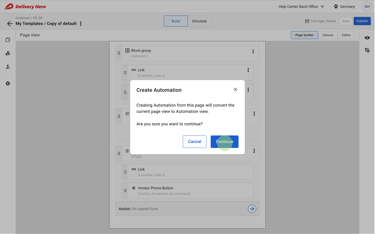
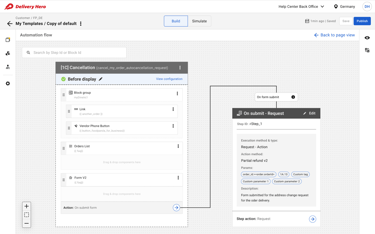
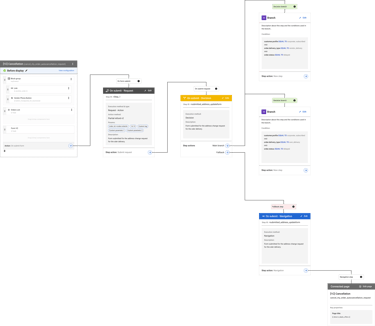
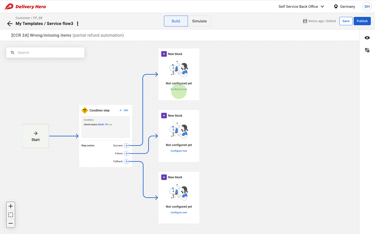
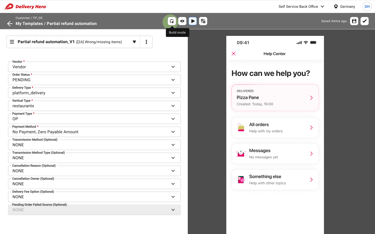
🛠 Iteration V1: Logical Flow Conversion
Approach: The first step was a direct translation of the existing code-heavy interface into a logical flow-based system—without major enhancements.
Why?
🔹 This allowed me to fully map out the current process and identify necessary steps.
🔹 Engineering had limited bandwidth to overhaul workflows, so an incremental approach was necessary.
🚀 Outcome: This foundational iteration provided a clear understanding of existing automation structures and helped define what changes were needed.
Following are the existing legacy state and the new v1 iteration of the visual flows.
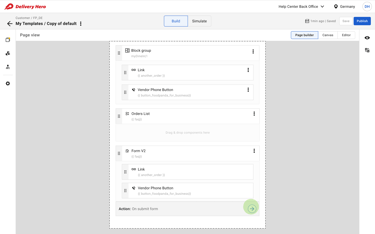
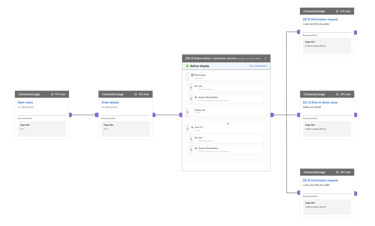
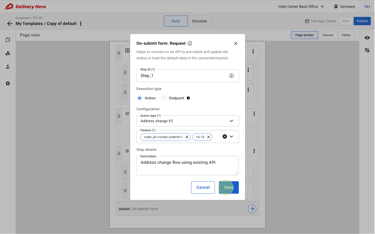
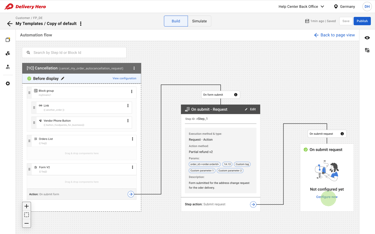

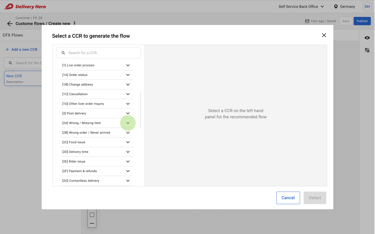

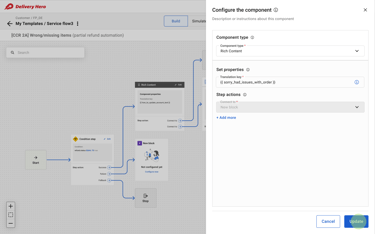

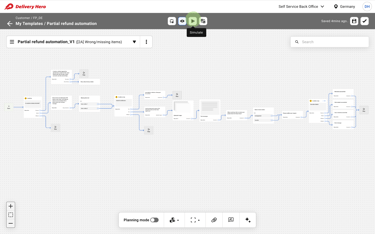
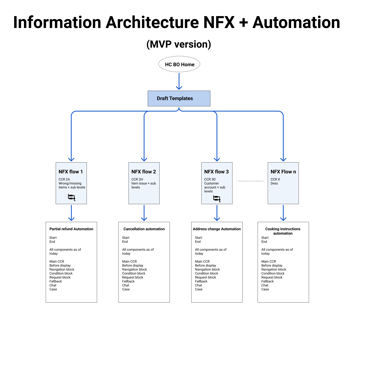
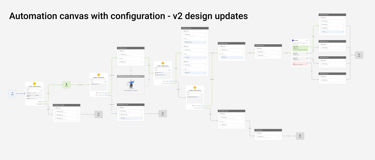
🛠 Iteration V2: Pre-Built Automation Templates
Enhancements: After studying the mapped workflows, I identified inefficiencies and introduced:
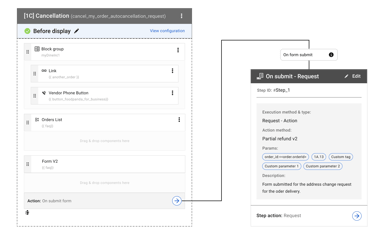
✔ Eliminating redundant steps – e.g., removing the unnecessary “before display” step, which was previously a required entry point.
✔ Decoupling automation flows from individual pages, allowing independent automation setups.
✔ Introducing multiple automation initiation methods:
Step-by-step manual flow creation 🛠 Allow the users to create brand new flows step by step building each step (Feedback: High learning curve, error-prone)
Reference-based customization 📖 Use an established flow created by the central team as a reference and build their own flows with customization (Feedback: Too much flexibility, leading to inconsistency)
Preloaded automation structures ⚡Minimal customizations in some core areas like currency setup for refund methods (Feedback: Best balance of efficiency & flexibility)
🚀 Outcome: The preloaded structure approach received the most positive feedback, as it significantly reduced setup time while allowing necessary customizations.
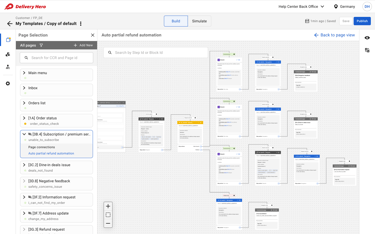
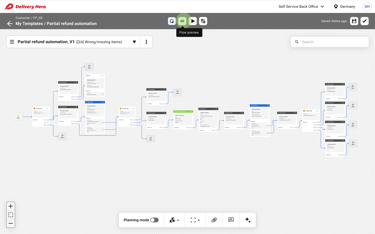
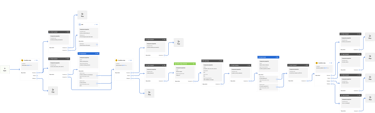
Following are the v2 iteration of the visual flows.
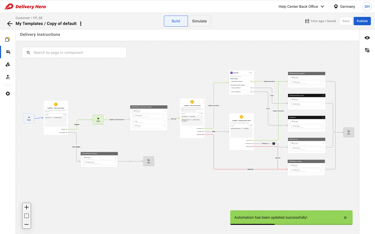
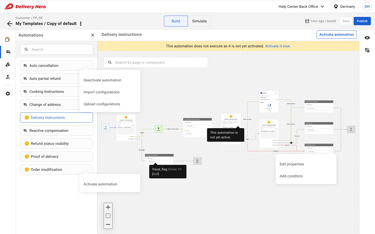
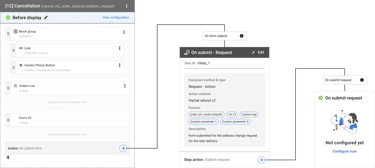
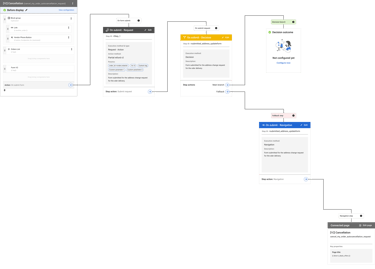
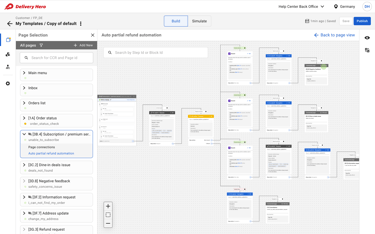
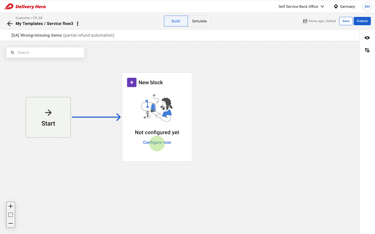
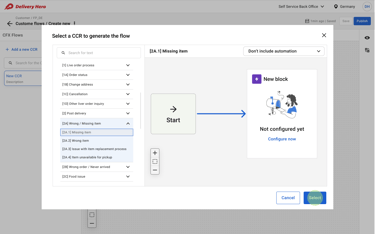
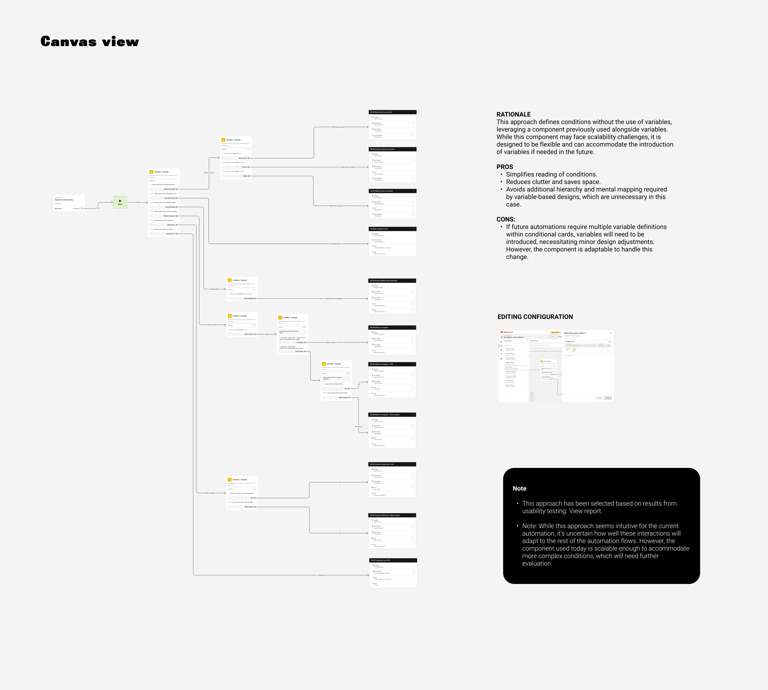
🛠 Iteration V3: Archetypes & Visual Feedback
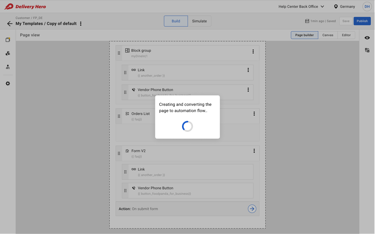
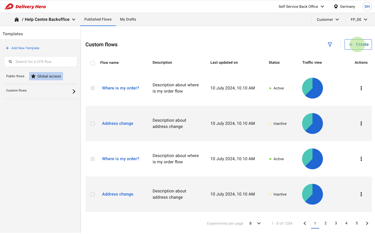
For the final iteration, I refined the solution into MVP-ready "Archetypes"—preloaded automation blueprints that could be activated instantly.
Key Enhancements:
✔ One-click activation of automation templates without manual setup.
✔ Seamless integration with existing pages, only requiring user confirmation.
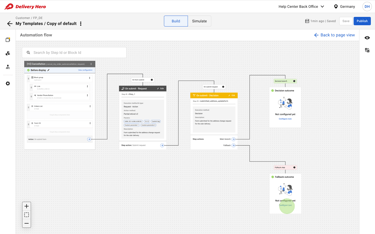
✔ Live visual feedback to indicate active automations and provide a clear overview.
🚀 Outcome: This iteration transformed automation from a complex, technical task into a simple, guided experience, reducing friction and increasing adoption.
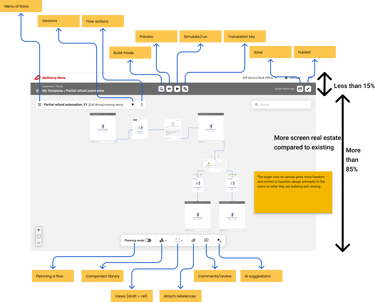
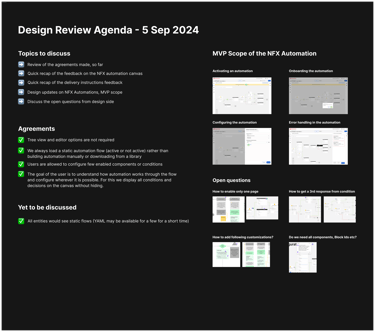
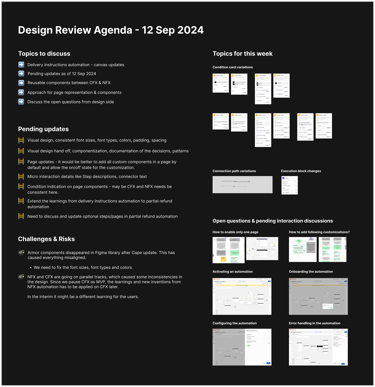
Following are the v3 iteration of the visual flows, edge cases and additional designs.
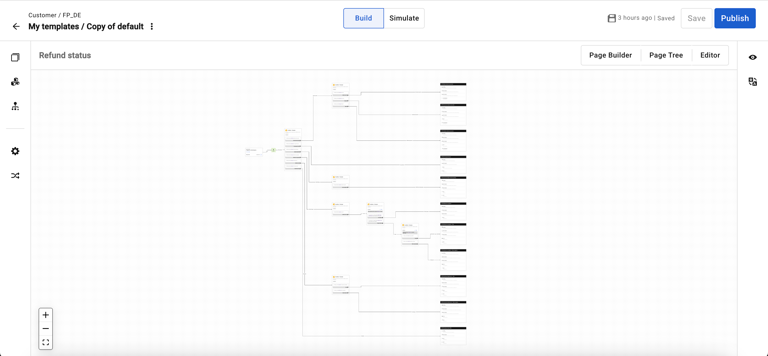
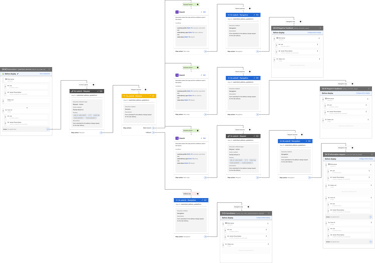
🛠 Final High-Fidelity Mockups & Prototype
🖥 Realizing the Vision: Polished UI, interactive elements, and seamless animations brought the design to life.
🛠 Prototype Testing: Provided stakeholders with an interactive experience to validate the solution before development.
6. Testing & Iteration: Ensuring a Seamless Experience
To validate my designs, I conducted:
🔬 10+ usability testing sessions with real users.
📈 Task-based performance tests measuring automation setup efficiency.
Results from Testing
✔ 50% faster automation setup (compared to YAML-based processes).
✔ 40% decrease in documentation reliance (thanks to visual workflows).
✔ 60% adoption rate within the first three months.
💡 “This makes automation feel like building LEGO blocks instead of writing code.” – A local team lead
7. How This Transformed Automation
📈 Metrics & Impact
📉 Reduction in Agent Contact Rate: Aiming for a 1% reduction, translating to fewer support tickets and major cost savings.
📈 Increased User Adoption: Expected 10% rise in active users, boosting automation efficiency across global teams.
⏳ Task Completion Time Savings: Targeting a 30% decrease, accelerating automation rollouts and improving productivity.
👍 Higher User Satisfaction: Striving for an 85%+ satisfaction score post-implementation.
8. Key Learnings & Reflections
✅ A no-code approach isn’t just a UX change—it fundamentally shifts operational efficiency.
✅ Visual Design Simplifies Complexity: The power of intuitive UIs in making automation accessible. Teams built more complex workflows with confidence.
✅ Iteration is Key: Continuous refinement through user feedback led to a superior design.
✅ Collaboration Fuels Innovation: Cross-functional alignment was critical to success.
✅ Live testing is risky – Simulation tools reduced bad customer experiences.
🚀 Next Steps: Expanding automation capabilities to external partners.
9. Final Thoughts
This project wasn’t just about improving UI—it was about scaling automation to empower teams. This project was a game-changer, revolutionizing automation usability and empowering teams globally.